Quality Assurance
Delivering quality parts that meet our customers’ quality requirements and expectations.
COMMITTED TO QUALITY, COMMITTED TO YOU.
Manufacturing Standards
CNC machining standards
RenderFact provides 3, 4, 5 axis CNC milling, CNC turning, and post-processing services for the diverse manufacturing requirements. Our general tolerances DIN ISO 2768 are +/-0.125mm (+/-0.005") and tighter tolerances up to +/-0.01mm (+/-0,000393") is available on your request.
| Part size | Tolerance | Angularity |
|---|---|---|
| < 300 mm (12″) | ± 0.125 mm (± 0.005″) | ± 0.5° |
| < 600 mm (24″) | ± 0.250 mm (± 0.010″) | ± 1.0° |
| < 900 mm (36″) | ± 0.400 mm (± 1/64″) | ± 1.0° |
| < 1500 mm (60″) | ± 0.8 mm (± 1/32″) | ± 1.0° |
| > 1500 mm (60″) | ± 1.6 mm (± 1/16″) | ± 1.0° |
EDM Machining
If you do not provide us with your tolerances for EDM Machining , we use standard tolerances for all processes as mentioned below. Tolerances can be greatly affected by part geometry and type of material. Our Engineers will consult you on every part of the project and will try to provide you with the highest degree of precision possible.
| Service | Standard Tolerances |
|---|---|
| EDM Drill | 0.0010″ to 0.0005″ and high precision tolerances as tight as 2µm Surface finishes down to 4Ra µin (micro inch) |
| EDM Wirecut | EDM Drilling: +/- 0.001” TOLERANCE |
| EDM Sinker | EDM Sinker: +/- 0.0002” TOLERANCE |
| *(Typical tolerance, but can vary due to type of material) | |
Injection molding standards
Various injection molding services, including rapid tooling, family molds, multi-cavity molds, over molding, etc. are provided here at RenderFact. Check the default manufacturing standards DIN-16901
| Part size (mm) | Precision tolerance | Ordinary mold tolerance |
|---|---|---|
| 1~22 | ±0.06~0.09 | ±0.08~0.13 |
| 22~70 | ±0.11~0.17 | ±0.14~0.24 |
| 70~160 | ±0.20~0.29 | ±0.30~0.43 |
| 160~250 | ±0.36~0.44 | ±0.51~0.68 |
| 250~315 | ±0.44~0.55 | ±0.68~0.85 |
| 315~500 | ±0.70~0.90 | ±1.08~1.38 |
| 500~1000 | ±1.20~1.90 | ±1.83~2.90 |
| 1000~1400 | ±2.30~2.65 | ±3.50~4.05 |
| 1400~2000 | ±3.05~3.80 | ±4.65~5.80 |
3D printing standards
If you do not provide us with your tolerances for 3D-Printing , we use standard tolerances for all processes as mentioned below. Tolerances can be greatly affected by part geometry and type of material. Our Engineers will consult you on every part of the project and will try to provide you with the highest degree of precision possible.
| Service | Standard Tolerances |
|---|---|
| FDM | Industrial FDM printing has a dimensional tolerance of ± 0.15% and a lower limit of ± 0.2 mm. |
| SLA | Industrial SLA printing has a dimensional tolerance of ± 0.15% and a lower limit of ± 0.01 mm. |
| SLS | SLS printing has a dimensional tolerance of ± 0.3% and a lower limit of ± 0.3 mm. |
| Metal 3D Printing | Metal printing has a dimensional tolerance of ± 0.1 mm. |
| Material Jetting | Material jetting has a dimensional tolerance of ± 0.1% and a lower limit of ± 0.05 mm. |
High Pressure Die Casting
If you do not provide us with your tolerances for High-Pressure Die Casting, we use standard tolerances DIN-1688. Tolerances can be greatly affected by part geometry and type of material. Our design engineers will consult you on every part of the project and will try to provide you with the highest degree of precision possible.
Renderfact’s Quality Control System
In our pursuit of high-quality parts and to satisfy our customers need, we deploy a series of inspection methods that overlooks the whole manufacturing process
Pre-Production Quality System
Technical Assessment
Just as we receive the confirmation on the quotation from the customer, our engineering team works on the manufacturability of part, its structure, process and analyses the drawing files both 2d and 3d for its completeness. This works as a checkpoint for any mistakes in the design issues at the beginning of the project.
Material Verification
On custom requests from the customers, we provide specialized certifications of the raw material from the material suppliers and include details like material grade, material dimensions, mechanical properties, chemical properties etc.
During Production
In-process quality Control
The quality staff at our facilities conduct routine inspections for all parts going out of the factory.
First-part verification
We offer first-part verification services when requested by the customers. This can be done on MOQ orders that are mutually agreed for that peace of mind. We will check and generate a report and forward it to you and even ship the part to you, if deemed necessary.
Final Check before Shipping
Full Dimensional Report
We provide full dimensional reports as well on the customers’ request. This report will include quantity on the order, critical to quality dimensions, tolerances, thicknesses and depths, appearances and photographs of parts as per details required by the customer.
Packaging
Shipments can be unpredictable, so we take utmost care when packing the parts.
We normally use 4 layers of protection to protect the part:
1. Wrapping paper/shrink wrap,
2. EPE Sheet,
3. Foam packing,
4. Wooden or Corrugated Boxes according to need for packaging and the distance to be covered by the parts.
First Part Verification Program
For your peace of mind, we offer first part verification before we start production at full scale
Having this makes the customer worry free and gives us the confidence to produce the order at full scale. This is included if an MOQ of 500 parts or an order value of 5000$ is made with us.
How is Done!
-
You request a first part verification after the quote is approved.
-
Renderfact reviews the quote and agrees to perform FPV.
-
You sign the quote provided by Renderfact and agree on the FPV terms and conditions.
-
We produce the first part and ship them.
-
You receive the parts and examine them and inform us to begin full scale production
-
The full production is started, and standard lead time quoted in the quotation is applicable on the order.
Quality Reports
Full Dimensional Inspection Report
For every order we process, a full dimensional inspection report can be made available on the customers’ request. Dimensions are verified by precision measuring tool or gauges and even a Coordinate Measuring Machine engages when required.
Quantity of parts on the order
Critical to Quality Dimensions
Tolerances
Thicknesses and Depths
Part Appearances and Photographs
Material Certification
For every order we process, a material certification of the material to be used in the manufacturing process and usually comes from the raw material supplier:
Material Grade
Material Dimensions
Mechanical Properties
Chemical Properties
Heat Treatment (if applicable)
Inspection Equipment
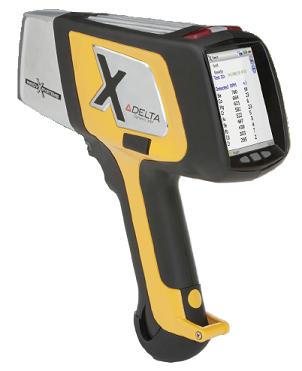
XFR
Renderfact employs X-Ray Fluorescence (XRF) analysis, a non-destructive testing method that uses short-wave X-rays or gamma radiation to determine the elemental composition of metals, plastics and other materials, to inspect the quality of the materials.
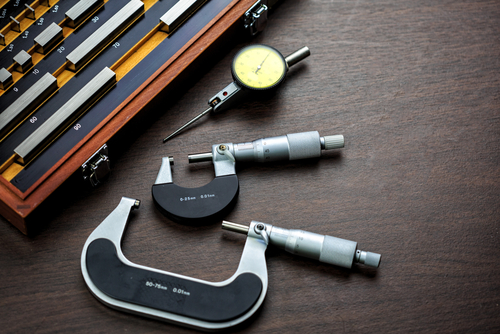
Bore and ID gages
measure the internal diameter of an object, either by indicating the deviation from a predetermined standard or by providing an actual measurement.
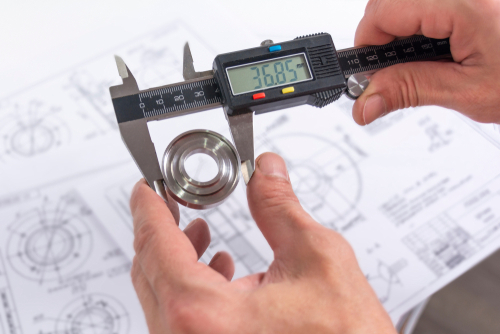
Calipers
provide inside, outside, depth, length, or step measurements using various technologies. Certain types can also be used to compare or transfer dimensions from one object to another, or to precisely mark a measurement.
Micrometers
are used for precision dimensional gaging and may use mechanical, digital, dial, scale, and laser technology. Micrometers can be used to measure the thickness, length, depth, internal diameter, outer diameter, height, roundness, or bore of an object.
Ring gages
provide a pass/fail assessment for shafts, pins, or threaded studs based on specified dimensional tolerances. Depending on the application, ring gages may be tapered, cylindrical, threaded, or smooth.
Thread gages
measure and/or verify thread size, spacing, shape, geometry, or other parameters
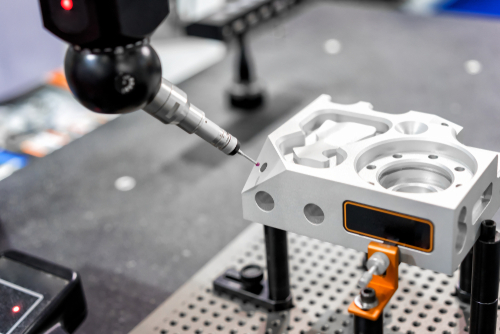
Coordinate Measuring Machine
Coordinate measuring machines (CMMs) are mechanical systems that use a measuring probe and transducer technology to convert physical measurements of a surface into electrical signals that can be analyzed by metrology software. CMMs range from basic XYZ read-outs utilizing hard-probes to fully automated systems with articulating continuous contact probing that can perform CAD model-based inspections.
Our Certification



Resolving Quality Issue
Renderfact’s number one priority is delivery best parts that meets its customer requirements. If our supply fails to meet specifications, please contact us within 7 business days and we will try and resolve the problem as soon as possible.
Rework when:
- Unacceptable defects
- Failed to meet tolerances
- Incorrect material/finish.
Refund when:
- The part is not machinable
- The customer does not agree for rework
- Other mutually accepted reasons.
Only 4 simple steps to complete your project. Follow the instruction and give it a try!


